Manga Lashes: Everything You Need to Know About the Viral Lash Trend
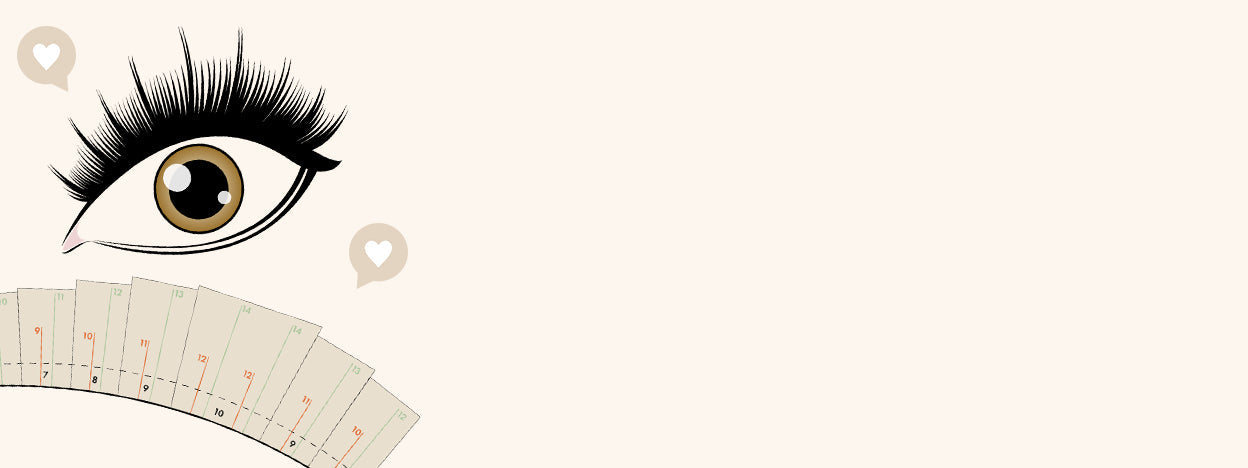

Table of Contents
How to Create Manga Lashes | Free Manga Lash Map
Manga lash extensions create an anime-inspired look using defined, longer spikes between shorter lashes. Often searched for as manhwa lashes or manhua lashes, this style combines noticeable separation and contrasting lengths for a textured, doll-like finish.
Manga lashes, also known as Manhwa lashes and Manhua lashes, are STUNNING. Whether you’re a fan of anime or not, you must admit that manga lashes are a gorgeous and ethereal lash look. This spider-like lash trend has taken over TikTok and Instagram and made “Anime eyes” one of the most recognizable lash styles in the game.
Unlike other TikTok trends, you won’t have to use a filter to achieve this look. Since TikTok creators such as @Sacheu have been experimenting with falsies and inspiring their audiences to create their own DIY Manga lashes, we need to give our two cents—we’ve got a longer-lasting solution that’s less fiddly (for your client, that is). If you are unfamiliar with the fascinating universe that is anime, buckle up, you’re in for a thrilling ride.

What Are Manga Lashes?
Manga lashes take inspiration from popular comic books, shows, and movies from the world of manga and anime. Think doe-eyed, spiky, and wispy, because that’s essentially the look you want to create.
Older and iconic characters such as Sailor Venus from Sailor Moon or Kirigiri from Danganronpa showcase the exaggerated lash styling associated with this look, making it perfect for cosplay.
So what do Manga lashes look like? You may already be familiar with Manga lashes, even if you’re not familiar with the term. The characters who inspire the look have bold lashes that appear as spiky clusters, spaced out along the top and bottom lash lines. These long spikes stand out from the other shorter lashes, resulting in an eye-catching, wispy lash look.
For professional lash extensions, each closed fan or spike is attached to one individually isolated natural lash. The grouped appearance should come from the styling, rather than sticking neighboring natural lashes together.
Manga, Manhwa and Manhua Lashes: What’s the Difference?
Manga originates from Japan, Manhwa is Korean, and Manhua originated in China. Although these comic styles have differences in storytelling, readership, and art styles, the names are often used interchangeably when describing anime-inspired lash looks.
There isn’t one universal lash map that separates all three terms. During a consultation, use reference photos to establish how bold your client wants the spikes, how much separation they prefer, and whether they would like lower-lash extensions included.

Incredible manga lashes by @lash.lavida
Who Would Want Manga Lashes?
Manga lash extensions are perfect for anime lovers and beauty lovers alike—you don’t need to be enthralled by Manga itself to showcase Manga eyelash extensions! Suitability depends on your client’s natural lashes, eye shape, and desired finish. This style of eyelash extensions can be adapted for clients who want a more open-eyed appearance and a bold twist to their everyday look.
They’re great for lash clients who are a sucker for a trend and are a match made in heaven for cosplayers who want to complete their costume and embody the look of their favorite Manga character. Not to mention, if you’re entering any lash competitions, Manga lashes really are a showstopper. That emphasized cartoon-style appearance is what makes them stand out!

Stunning eyelash extensions by @nalash.byngoc
Manga Lashes vs. Wet Look and Wispy Lashes
These styles share a love of texture, but the placement and contrast between the lashes help create different finishes.
| Style | Main styling feature | Overall finish |
|---|---|---|
| Manga lashes | Prominent, separated spikes contrasted with shorter lashes. | A bold, anime-inspired look with clearly defined lash segments. |
| Wet look lashes | Fine volume lashes kept together as closed fans throughout the set. | A defined, freshly wet appearance that can be subtle or dramatic. |
| Wispy lashes | Contrasting lengths arranged to create texture and an uneven top line. | A fluttery finish that can overlap with manga or wet look styling. |
If your client prefers more continuous definition with less pronounced separation, take a look at our wet look lashes tutorial for another way to work with closed fans.
How to Map Manga Lashes
Like we always say, you must map your client’s eyelash extensions depending on their face shape, eye shape, and the state of their natural lashes. We’ve taken some of the guesswork out of it for you with our free Manga lash map—you can adapt it to create a dramatic and wispy lash effect or a more subtle fluttery effect, per your client’s wishes and facial features.
Manga eyelash extensions are distinguishable by their spiky appearance, with noticeable long lash segments alongside shorter, fluffy lashes. Begin by applying the lashes in layers, with the bottom layer of the upper lashes holding the shorter lashes, and the top layer holding the longer spikes. For the middle layer, use closed fans to create a seamless visual blend through all three lash layers.
To create the dramatic spikes for the top layer, form defined closed fans situated next to shorter wispy lashes. It is also important to pay attention to placement, keeping the main spikes visibly separated and balanced across the lash line. Compared with many wet look or Kim K sets, a manga set places particular emphasis on distinct, spaced-out spikes. This contrast helps create that must-have doe-eyed look.

Manga Lash Mapping by Layer
The lengths and diameters below describe our example map, rather than a prescription for every client. Adjust the length, diameter, and number of fibers in each fan to the natural lash supporting it.
| Upper-lash layer | Example extensions | Purpose |
|---|---|---|
| Top layer | Closed fans using 0.05 mm lashes, with example lengths of 10–14 mm. | Create the prominent, separated spikes. |
| Middle layer | Closed fans using 0.05 mm lashes, with example lengths of 8–12 mm. | Blend the shorter base with the longer spikes. |
| Bottom layer | Shorter, open fans using 0.04 mm lashes, with example lengths of 6–10 mm. | Create a softer base that helps the spikes stand out. |
Top Layer: We suggest creating closed fans and long spikes using fine volume lashes. In this example, the lengths range from 10 mm to 14 mm. Increase the length from the inner corner towards the center and outer quarter of the lash line, then decrease the length as you reach the outer corner. Place the main spikes at balanced intervals for a symmetrical finish, adapting their positions to each eye.
Middle Layer: Our example uses 0.05 mm closed fans in lengths of 8 mm to 12 mm, following the same overall shape as the top layer. The middle layer provides a visual transition to the longer spikes—not physical support. Each fan must be attached to its own isolated natural lash.
Bottom Layer: The bottom layer of the upper lashes holds the smaller wispy lashes that help your spikes really pop. Our example uses fluffy, short fans in 0.04 mm, ranging from 6 mm to 10 mm, to create a multidimensional look. This is separate from adding extensions to the lower lash line.
Curls: The curls you use will really depend on the client. It’s best to tailor them to your client’s natural lashes and the result you’re aiming for. Learn more about lash curls here!
How to Create Manga Lash Extensions: Step by Step
- Plan the look: Review reference photos with your client and assess their natural lashes. Decide how bold the spikes should be and whether lower-lash extensions are suitable.
- Prepare and map: Complete your usual professional pretreatment and mark the main spike positions alongside the shorter lengths that will sit between them.
- Create the shorter base: Work through the bottom layer of the upper lashes, isolating each suitable natural lash and keeping the base shorter than the main spikes.
- Blend the middle layer: Add appropriately sized closed fans to connect the shorter base visually with the longer top-layer spikes.
- Place the statement spikes: Follow your planned positions, checking the contrast and balance from different angles as you work.
- Check and finish: Complete a thorough isolation and stickie check, assess symmetry, and explain the client’s aftercare routine.
London Lash Top Tip: The easiest way to create spikes is to use Primer on a micro swab and apply it along the tips of the lashes while they are on the strip. This will make picking up your spikes really easy, as it will help keep the tips together. Take care to avoid getting the primer on the bases of the lashes as this will cause your glue to polymerize quickly, which can cause retention issues.

Bottom Lashes
As our lash map illustrates, Manga lashes can be applied to the top and bottom lash lines. With the addition of suitable lower-lash extensions, your client’s Manga lash set can really pop and create a beautiful finish!
Lower-lash extensions are optional, and not every client needs them to achieve a manga-inspired look. Assess suitability separately and only offer this service within your training. Our bottom lash extensions guide explains the technique and considerations in more detail.
Frequently Asked Questions About Manga Lashes
Are manga lashes and manhwa lashes the same?
The terms are often used to describe similar anime-inspired lash looks with longer, separated spikes. Manga, manhwa, and manhua have different cultural origins, but lash artists do not all use these styling names in exactly the same way. Reference photos are the best way to agree on the finish your client wants.
What is the difference between manga and wet look lashes?
Both styles can use closed fans. Manga lashes emphasize prominent spikes separated by shorter lashes, while wet look sets typically use closed fans more continuously across the lash line. The styles can overlap, depending on the map and amount of texture.
Can manga lash extensions look subtle?
Absolutely! Shorter lengths, less contrast between the base and spikes, and carefully chosen placement can create a softer version. You can keep the recognizable manga texture without going all out with a dramatic finish.
Do manga lashes need lower-lash extensions?
No. Lower-lash extensions can enhance the anime-inspired effect, but an upper-lash set can still create a manga look through spike placement and contrasting lengths. Choose the approach that suits the client and their natural lashes.
How do you adapt manga lashes for sparse natural lashes?
Work with the available healthy natural lashes and plan the spikes around them. A softer base and less dramatic length contrast may create a more balanced result. Avoid adding excessive length or heavier fans to compensate for gaps, and explain what coverage is achievable during the consultation.
Please tag us in your Manga lash creations! We can’t wait to be inundated with Manga lash content over on our Instagram. Love, love, love!
Check out these featured products