How to Map a Squirrel Lash Set
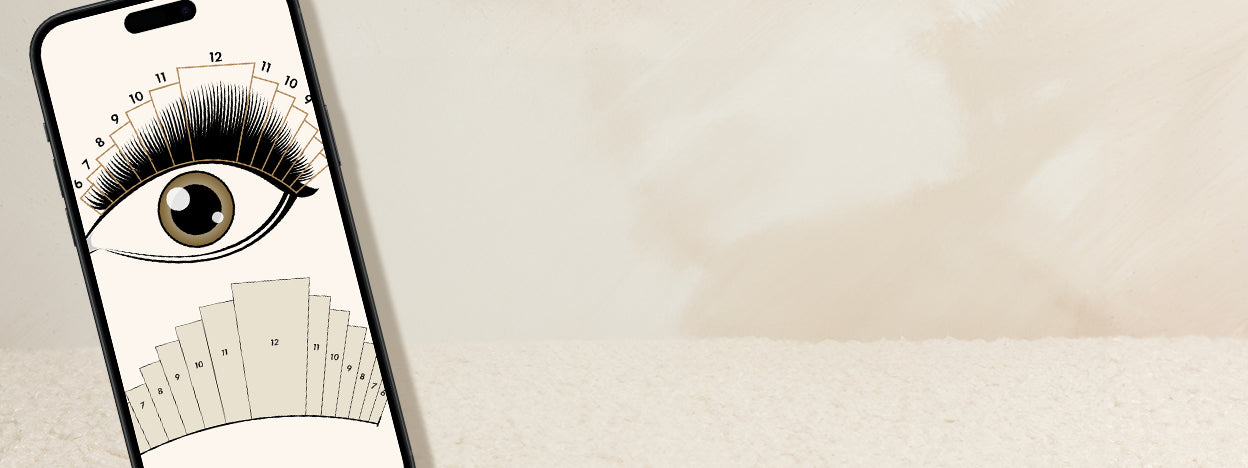

Table of Contents
Squirrel Lash Map: A Step-by-Step Guide
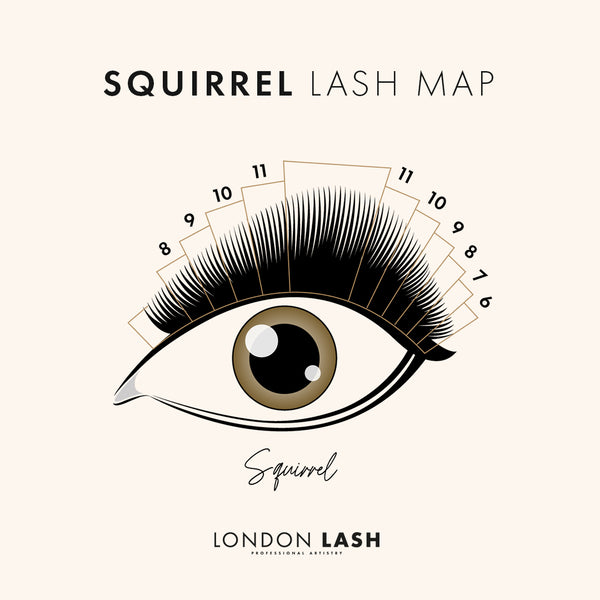
A squirrel lash map gradually increases in length toward a peak before the outer corner, then tapers down toward the end of the lash line. This creates an arch rather than placing the longest extensions at the outermost corner. The exact lengths and peak position should be adapted to your client.
Mastering lash mapping is an important part of a flourishing lash extension career. Thoughtful mapping helps you avoid abrupt length transitions and customize each set to the client. The Squirrel lash map is a useful addition to your repertoire — let’s explore how to create it!
How to Map a Squirrel Lash Set
Use the illustrated sequence below as a starting point. Choose suitable lengths, diameters, and curls after assessing the client’s natural lashes and discussing the desired result.
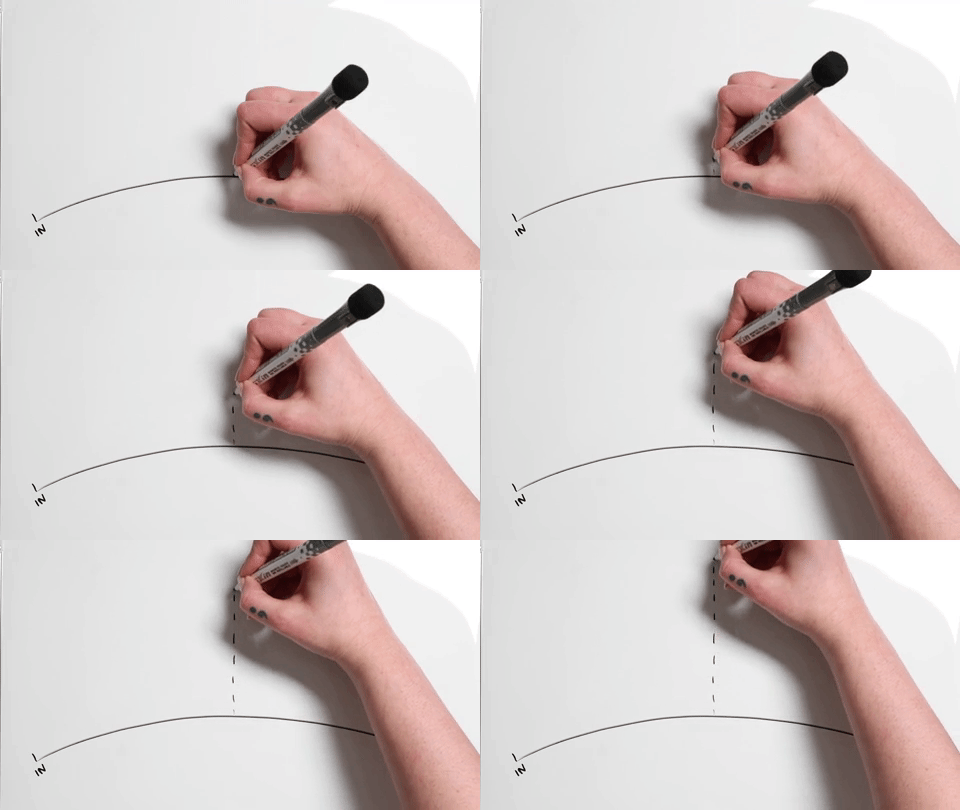
Step 1: Mark the Inner Corner, Outer Corner, and Center
Begin by identifying the first and last natural lashes you intend to work with, then mark the eye’s center on the eye patch. Assess the client with their eyes open before application so you understand how the planned shape will look.
Step 2: Position the Longest Section
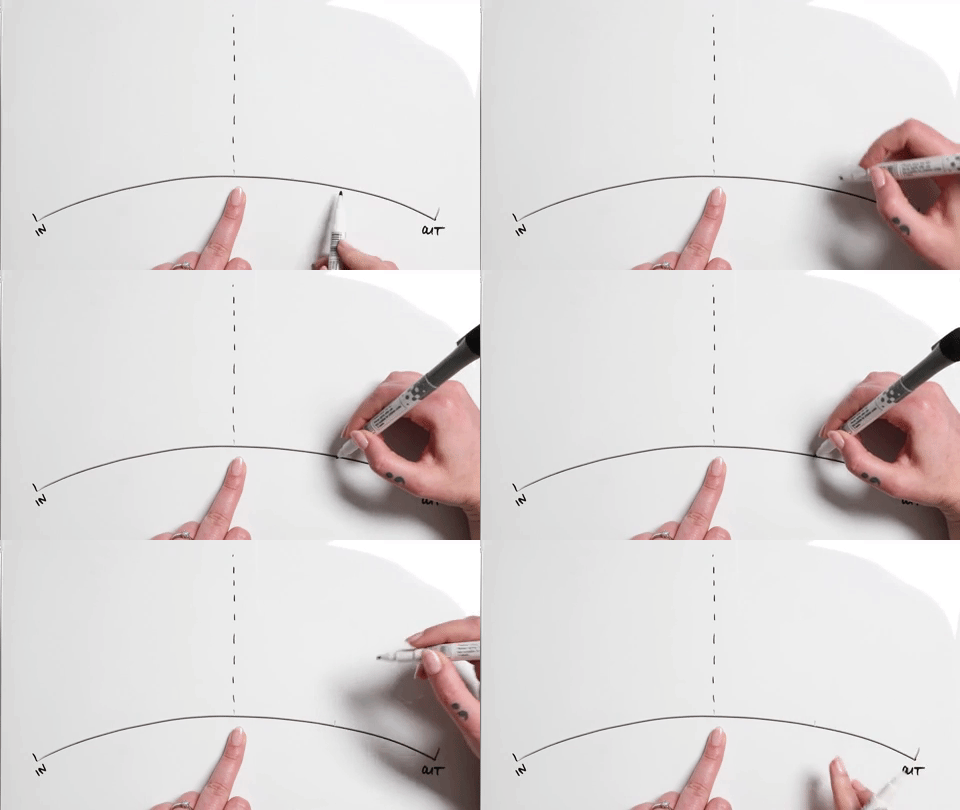
Next, find the midpoint between the center and the outer corner of the eye. In this example, that is where the longest extensions will sit.
Treat this position as a starting point rather than a fixed rule. Adjust the peak to the client’s eye shape, lash growth direction, and the effect you agreed on during consultation.
Step 3: Divide the Outer Section
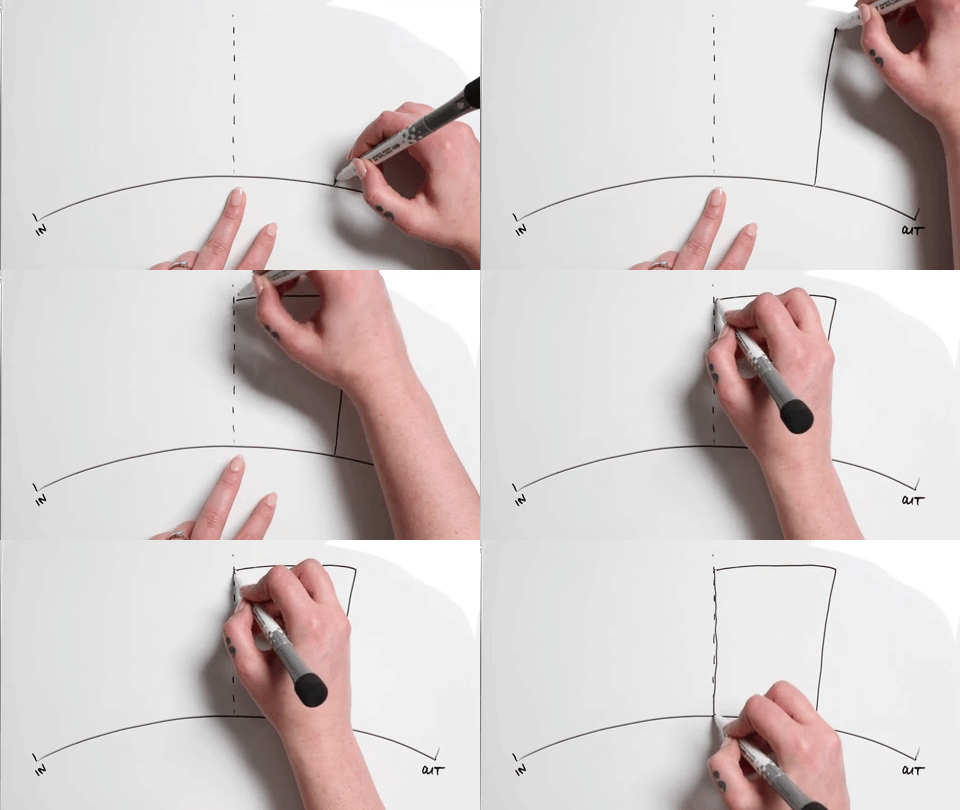
After establishing where your longest lengths will sit, divide the remaining outer section in half, then divide those sections again as shown. These markings help you plan a controlled taper toward the outer corner.
Step 4: Taper Toward the Outer Corner
Now, progressively decrease the extension length from the peak toward the end of the lash line. The illustrated example uses 1 mm reductions between sections.
The important feature is the shortening after the peak, not a compulsory 1 mm change for every client. Choose transitions that work with the natural lashes and avoid an abrupt step in the finished top line.
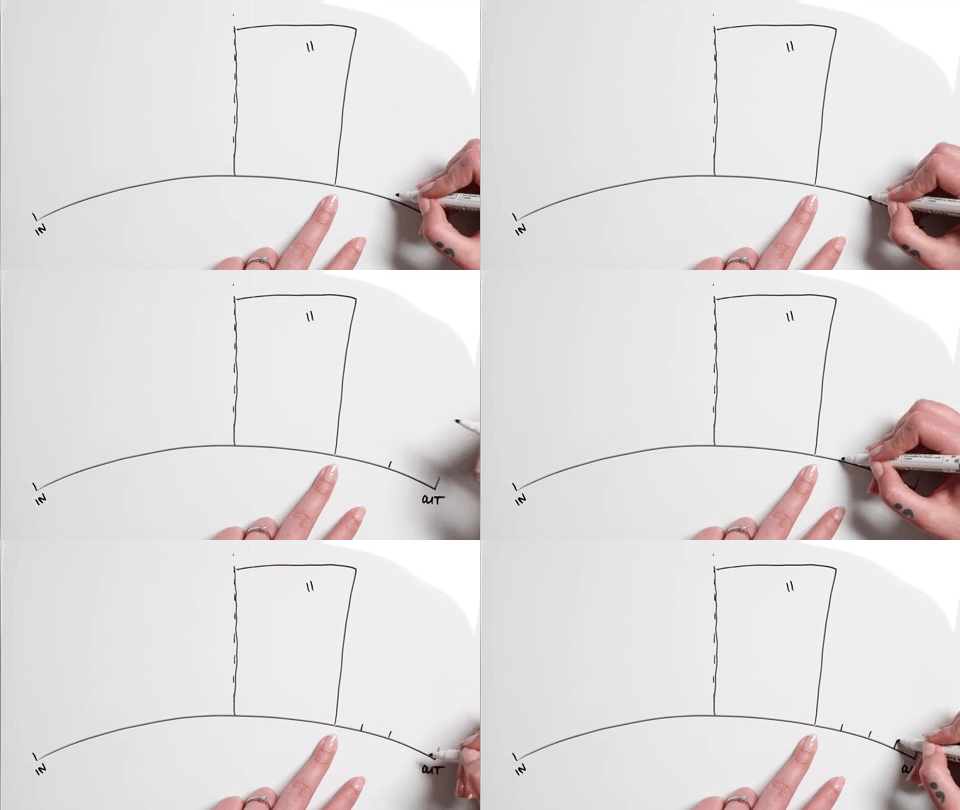
Step 5: Refine the Outer Lengths
Feel free to adjust the number of lengths used in the taper. Pay particular attention to the finer natural lashes near the outer corner, choosing an appropriate extension weight and length for each lash.
A shorter extension does not automatically make an attachment suitable. Continue to assess the natural lash and maintain careful isolation throughout application.
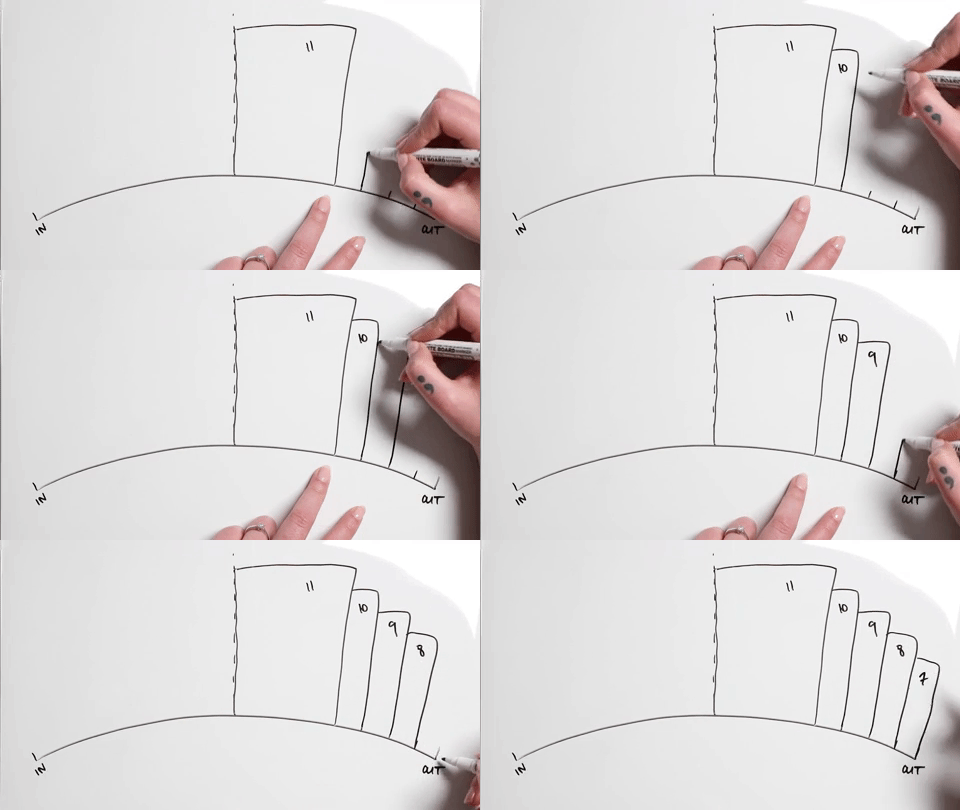
Step 6: Complete the Map Toward the Inner Corner
After planning the peak and outer taper, work back toward the inner corner, gradually reducing the lengths. The illustrated map uses a different progression on this side of the peak, but the transitions should still suit the client’s natural lashes.
The number of lengths alone doesn’t determine how defined the arch will look. Peak placement, the difference between lengths, curl choice, and layering all influence the final shape.
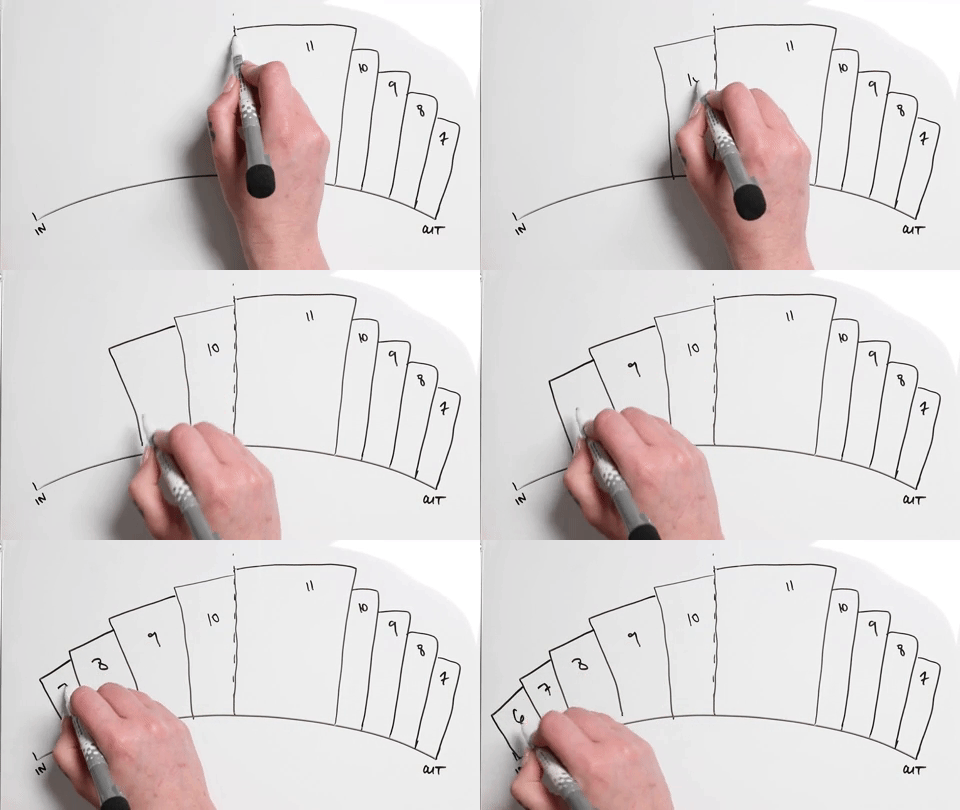
Who Might Suit a Squirrel Lash Map?
A Squirrel map can be useful when you want an arch toward the outer part of the eye without keeping the longest lengths at the very end. It may offer an alternative when an elongated Cat Style would place too much visual emphasis on the outer corner.
However, no map suits everyone automatically. Consider the client’s eye shape, eye spacing, natural lash direction, and desired finish together. Check both eyes individually rather than assuming identical markings will create the same visible result.
Understanding when to adapt a map helps you tailor lash styling to each client. For other starting points to practice, explore our downloadable lash map examples.
Squirrel Lash Mapping FAQs
What Is the Difference Between Squirrel and Cat-Eye Lash Mapping?
A Squirrel map places its peak before the outer corner and then noticeably shortens toward the end. A Cat-Eye map generally places its length emphasis farther outward for a more elongated effect, although its final corner lengths may also need tapering. Explore our Cat-Eye lash mapping guide for that tutorial.
Can You Use a Squirrel Lash Map for Classic and Volume Sets?
Yes. Squirrel describes the arrangement of lengths, while Classic and Volume describe application techniques. You can adapt the map for either, choosing suitable extension diameters and fan weights for the natural lashes. The same map can look softer or denser depending on those choices.
There you have it! Build toward the peak, taper the outer corner, and adapt the details to your client. Keep the illustrated map as a reference rather than a fixed prescription for every set.
For a different placement of the longest lengths, take a look at our Dolly lash mapping guide.
Check out these featured products