
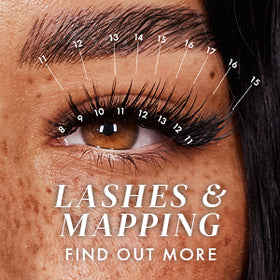

7 FREE LASH MAP STYLES FOR YOU TO USE!
It would be very convenient if we had a one-size-fits-all lash map so that we’d be able to lash on autopilot, but the fact of the matter is that each of us has a completely unique set of eyes, and a different bone structure. Due to this, it pays to be able to map each and every lash set based on our clients’ specific eyes and face shape. If you’re not sure where to even begin, we’re here to help!
You have your 3 main styles which we’ll go over in a bit more detail in a moment, but within those styles you can do almost anything! Make them dense, make them wispy, use classic lashes, make a hybrid set, opt for volume - the possibilities are endless!
Style 1 - Dolly
A Dolly style, sometimes referred to as an ‘open eye’ style does exactly that - it gives the eyes a more open appearance. A Dolly style is characterized by being perfectly symmetrical across the eye, with the longest lengths in the very center of the eye, tapering towards the inner and outer corners. A Dolly style is ideal for those clients who have a wider set of eyes as it won’t make the eyes appear further apart in the way that a cat style would. Dolly styles also make the eyes appear rounder or more open, so they look quite nice on an almond shaped eye.
We’d advise against a Dolly style for clients who already have quite round eyes, or whose eyes are already quite close together as it can create the illusion that their eyes are bulbous or even closer together. 
Style 2 - Cat
A Cat style is highly coveted - everyone has heard of a cat style and everyone asks for one, too. However, a Cat style is almost the antithesis of a Dolly, and as such, not everyone can pull off a Cat style without looking sad.
A Cat style is defined by shorter lengths sweeping into longer lengths on the outer corner of the eye - generally speaking we are dropping down at least 2 lengths in the outer corner just to protect the natural lashes there, but you’ll get that same flick you’d be aiming for when drawing a cat eye with eyeliner. 
Cat styles can be very sexy, and are well suited to those whose eyes are angled upwards at the outer corners, clients whose lashes grow straight or upwards, and those who have very round eyes.
A Cat style should be avoided if your client has a very wide set of eyes as it creates an optical illusion of more space between the eyes. We’d also typically recommend avoiding Cat styling for clients whose lashes grow downwards in the outer corners, as the longer lengths can weigh down the natural lashes further, creating a sad look in the eyes. That being said, if you’re confident using M curl lashes or L curl lashes, you may still be able to create an effective Cat styling, as these curls will give you some extra lift in the outer corners.

Style 2.5 - Fox Eye / Extreme Cat-Eye
A variation on a classic Cat Style is called an Extreme Cat Eye, or sometimes a Fox Style - this style is similar to a cat in that it creates a sort of eyeliner effect, and is mapped in a similar way with longer lengths on the outside of the eyes. The difference with this style though, is that you use shorter lengths for more of the eye and really elongate the outer lashes.
Again, you’ll want to avoid this style on clients with a wider set of eyes, or a client whose lashes grow downwards, for the same reasons as you would for a Cat.

Style 3 - Squirrel
A Squirrel style is pretty much the closest thing we have to a one-size-fits all lash set in that they suit almost everyone. A Squirrel map basically follows the growth of the lashes, with the longest lengths sitting just under the brow arch.
If a client has a very wide set of eyes, a Squirrel might still not be the best style for them, so either opt for a Dolly, or go for a Natural lash set instead.

Style 3.5 - Natural
A Natural set is arguably an offshoot from a Squirrel in that it follows the natural lash growth, however while a Squirrel style’s longest lengths are toward the center of the eye out to just past the edge of the iris, a natural set’s longer length will start closer to the inner edge of the iris and might go out a bit further than the outer edge.
With a Natural set, you’ll be using fewer lengths as well, so you’ll have a less obvious arch to the lash shape. We know we’ve got this down as style 3.5, but think of a Natural map as a cross between a Dolly and a Squirrel.

How to Play With Your Top Line
Lash maps don’t mean you can’t have fun with the lashes themselves - while we always advocate for mapping to ensure you have some symmetry across the eyes, one thing we’ll never advocate for is boring lashes! We never want two lash sets to look the same, after all.
When you know which shape you’re choosing for your client, there’s no rule that says what their top line has to look like. By using the layers of the lashes, you can create 3 quite different top lines.
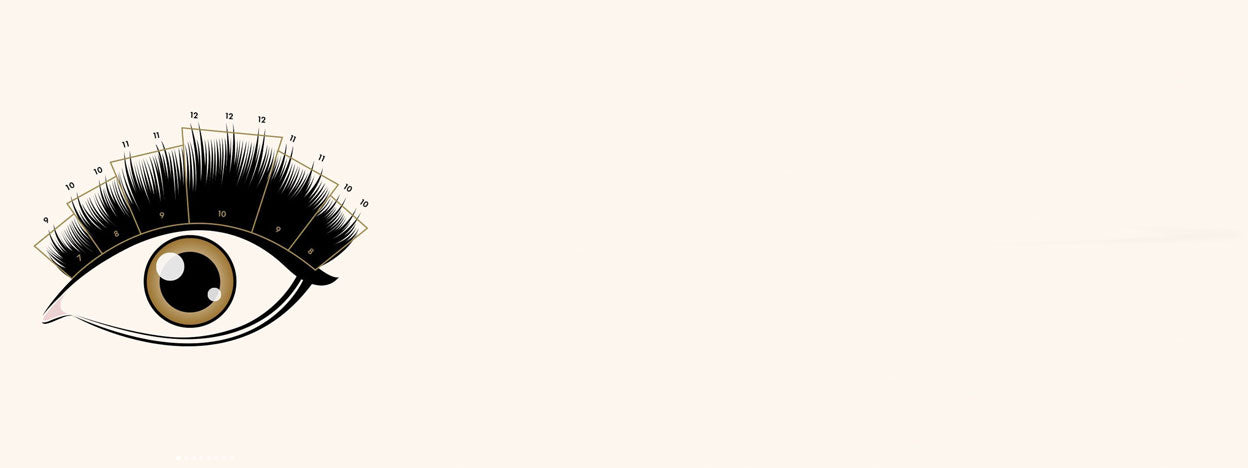
For a very even top line characteristic of traditional Russian Volume styles, you’re going to apply your longest length on the bottom layer, and drop down 1mm for each layer you go up. Let’s say our lash map says we’re applying 11mm in one section - for that section, apply 11mm on the bottom layer, 10mm on the middle layer, and 9mm on the top layer. Do this all the way along the eye and you’ll have a super even top line!
For a more natural look, simply use the same length on each layer. You’ll have a little bit of a wispy finish along the top line but nothing too intense.
For those who love a wispy finish, just reverse what you did for the even top line - going back to our example of an 11mm section, you’re going to apply 9mm on the bottom layer, 10mm in the middle and 11mm on the top layer. Not only will this give you a lovely wispy top line, it will keep density through the lash line which will give you a nice eyeliner effect!
Lastly, to create that highly sought after Kim K effect, you can do any of the above top lines, but throughout your set, just map in some spikes are regular intervals. Spikes are super easy to create by just applying a little bit of primer to the tips of your volume lashes. We’d recommend that for the best look, you make your spikes 2-3mm longer than the other lashes in the map (if your section is 11mm, place 13mm spikes, for example)

Now for the fun part…
You didn’t think that was all, did you? There’s basically no end to what you can do with lash extensions - of course now you know all the main styles and how to create all sorts of top lines, but why stop there? Try adding in color to complement your client’s eyes, or just to turn heads as they walk down the street. A little pop of color added to the outer corner is an effortlessly cool way to take a lash set to the next level, or even making your spikes in a wispy set with coloured lashes is so fun for you and your client.
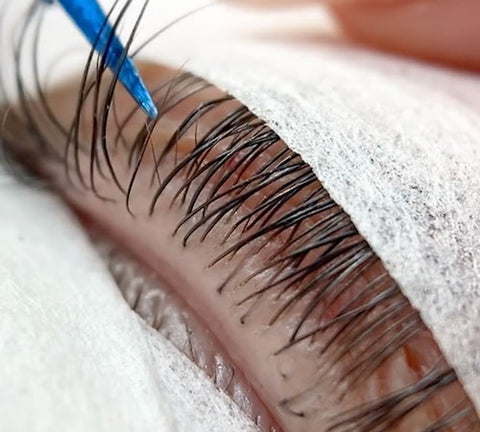
If you’re feeling extra adventurous, really play around with which lashes you’re using - mix premade fans with handmade closed fans to create loads of texture, and maybe even add in some flat lashes for an extra spiky finish, like we did in this lash set:
Here's the map for this set, if you'd like to recreate it:

When it comes to lashes, the world - as they say - is your oyster. Go out there and get creative - we don’t know anyone who doesn’t love something that’s unique to them, so why not be known for being the most creative lash tech in town? Check out our Part 2 for six more free lash maps!