


The Eyepatch 411
Thinking that selecting eye patches is as straightforward as grabbing the first pack you spot is understandable. After all, they're just small patches, right? How complex could the choice be? However, the reality is that finding the ideal eye patches for your clients can be the key to effortless, flawless applications session after session, or it can lead to so much frustration you're tempted to ditch your tweezers and swear off eyelash extensions altogether!
To help you understand everything you need to know about eye patches, our Master Trainer, Lash Artist, and Head of Education, Karolina Swiderska, has compiled the ultimate eyepatch guide, doing the heavy lifting so you don't have to!

Choosing The Perfect Eye Patches
You might have noticed our eye patch selection and wondered about the variety. Each type of eye patch has its unique features, making them more or less suitable for different clients.
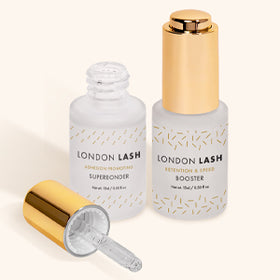
- Teflon eye patches are small in size, boasting a non-stick top layer that's a godsend for working with clients who have downward-growing lashes or if you’re new to lash extensions and more prone to stickies (we’ve all been there!). Their special gel formulation ensures they stay put, making them particularly suited for clients with oily skin or deep-set eyes.
- Nano-Hydro Gel eye patches are designed for ease of placement, even for those new to lash artistry. Their ergonomic shape and thin gel strip allow for the eyes to be fully closed, minimizing the risk of chemical burns, while the aloe vera extract adds a touch of spa-like luxury.

Tips & Tricks
After selecting your ideal eye patches, you might still encounter a challenging client with unique eye shapes. Fear not! Learning to tailor the eye patches by cutting them can transform your application process, even for those with smaller or rounder eyes. Now, you need to perfect your placement as placement is key. Prep and place like a boss!

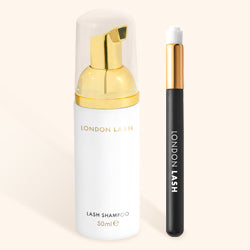
Mastering eye patch placement is crucial. Start by prepping the lashes with Lash Shampoo, and then clean the lashes and skin with Protein Remover Pads. This ensures the eye patches stay in place without slipping because your eye patches will definitely not stay in place if your client has oily, makeup-cover skin! After you’ve cleansed, let the skin dry before placing the eye patches.
Placement is a three-step process:
-
Begin at the inner corners to avoid placing the eye patch too close or too far from the eye and nose.
-
Follow the lash line, positioning the eye patch about 1mm below the waterline to prevent irritation and discomfort. If it’s placed too close to the eyeball, this can lead to twitchy eyes and chemical burns. On the other hand, make sure not to place the eye patch too low as it may cause bottom lashes to come out from under the eye patch, and stick the extensions to them.
-
Adjust the outer corner of the eye patch for comfort, and use surgical tape for any stubborn baby lashes. Regular checks during the session will keep your client comfortable and ensure no lashes escape.
Why Not Just Use Tape?
While tape is an option, it comes with its own set of pros and cons:
Pros:
- Easily adaptable to all eye shapes and sizes.
- You can get more uses out of a roll of tape than a box of eye patches.
- Clients are less likely to be allergic to tape, making it a good alternative for those who have allergies to ingredients in eye patches.
Cons:
- Less comfortable than eyepatches.
- Can be painful when removed as it may pull on the lower lashes.
- Difficult to correct compared to eyepatches.
- Harder to draw a neat lash map on.
- Leaves more marks on the skin compared to eye patches.
- Not as luxurious for clients.
- May roll making it uncomfortable to work with.
- Too thin to protect the clients' delicate skin from sharp tweezers.

Common Mistakes With Eye Patches
Avoid these common pitfalls for a seamless application:
- Incorrect eye patch size for the client.
- Placement too close or too far from the eye.
- Too high on the nose bridge or too far from the inner corners
- Excessive pressure during application or adjustment, causing them to move.
- Not checking the eye patches throughout the treatment can lead to misplacement, irritation, and stickies.

Eye patches, when used correctly, elevate the luxury of your service and enhance client satisfaction, and not to mention will help you lash! And with new products on the horizon, including alternatives for those allergic to standard eye patches, there's even more to look forward to.
Stay tuned to our Instagram and website for upcoming launches, and try out our eye patch samples to find your new favorite eye patches!
Until next time, Lash Lover,
LLP x